👨💻 Extending Wingman
Creating A Wingman EditorWindow
Creating your own Wingman editor window is simple!
Create a new .cs script
Create a new .cs script as follows:
using Codematik.Wingman.Runtime;
using UnityEditor;

public class WingmanCustomWindow : WingmanEditorWindow
{
    /// <summary>
    /// Window properties
    /// </summary>
    protected override WingmanWindowProperties WindowProperties() => new WingmanWindowProperties
    {
        WindowName = "Custom Window",
        IconLocation = "",
        WindowContentStyle = "",
        WindowSubheader = "",
        Key = "custom_window"
    };

    [MenuItem("YOUR_MENU_PATH_HERE", false, 1001)]
    public static void ShowWindow()
    {
        GetWindow<WingmanCustomWindow>(nameof(WingmanCustomWindow)).Initialize();
    }
}
Implement the WindowProperties override, supplying the following fields:
- WindowName, The name of the window
- IconLocation, The location of the Icon for the EditorWindow (optional)
- WindowContentStyle, The ContentStyle of the EditorWindow (optional)
- WindowSubheader, The subtext for the EditorWindow header (optional)
- Key, A custom key for the window - used to refer to this window in saved responses
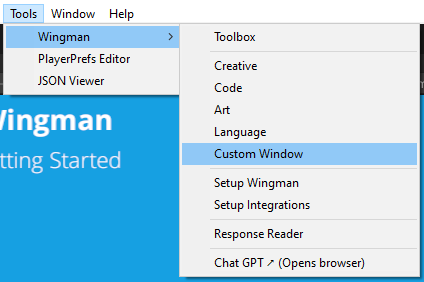
You should now be able to open a blank EditorWindow for example: Tools > Wingman > Custom Window
Render your EditorWindow GUI
To bring the custom EditorWindow to life you will have to override WingmanEditorWindow's OnGUI() method providing your own functionality for rendering your GUI. Fortunately WingmanEditorWindow contains lots of IMGUI helpers, making it more consise to draw what you need to an EditorWindow.
Add an OnGUI() override to your new script such as:
protected override void OnGUI()
{
    base.OnGUI();
    InitializeTab("basic", true, SystemService.LoadSystem("development_assistant"));
    StartWindowScroll(0f);
    DrawTitleAndTagline("Custom Window", "A custom window");
    DrawOptionalHelpBox
    (
        message: "This will appear in the hint window",
        type: MessageType.Info,
        wide: true
    );
    DrawAdditionalOptions();
    DrawEmptyChatBox();
    SendCompletionRequestButton("Send", "gpt-3.5-turbo", _userPrompt);
    ClearConversationButton();
    DrawConversation();
    EndWindowScroll();
}
Let's break this down line by line:
InitializeTab(promptName, keepConversation, systemMessage[optional]) - Initialze this window, supplying a prompt name (loaded using the PromptService), whether to persist the user's conversation and a system message for the AI to use
StartWindowScroll(headerHeight) - Calls EditorGUILayout.BeginScrollView to begin a scroll view for the entire EditorWindow. Anything you want fixed as a "header" you should put above this call.
DrawTitleAndTagline(titleText, taglineText) - Draws a title and subtitle for this window using built-in editor styles.
DrawOptionalHelpBox(message, type[optional], wide[optional]) - Draws an optional help box with a message, optionally supplying the help box type and whether to render wide.
DrawAdditionalOptions(drawExtras[optional]) - Draws some predefined additional options such as "response creativity" and "use gpt-4". Can supply a delegate method to draw additional options only for this window
DrawEmptyChatBox() - Draws a chat box and assigns the user input to the _userPrompt protected field.
SendCompletionRequestButton(buttonText, modelKey, params promptData) - Draws a send request button. buttonText is the text displayed on the button. modelKey is the key for the model to be used (eg: gpt-3.5-turbo). promptData are string params to be supplied to construct the prompt.
ClearConversationButton() - Draws a "clear conversation" button.
DrawConversation() - Draws the current conversation in full.
EndWindowScroll() - Finally ends the window scroll for the entire EditorWindow
This is just a starting point for creating your own window. If you're looking for a more complex example, check out the ArtWindow.cs class or the CodeWindow.cs class.
Done!
Now open the window via Tools > Wingman > Custom Window and you should see the following window
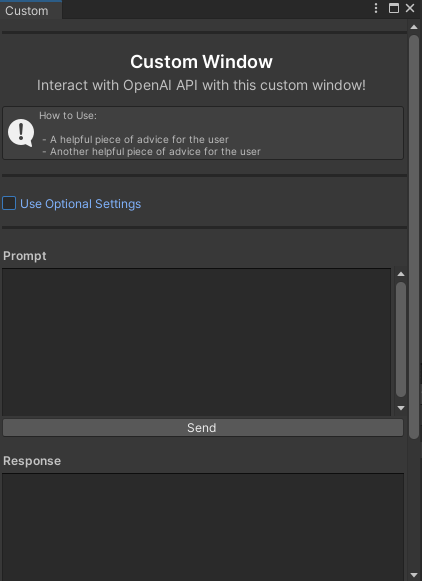
You should now be able to interact with this window.
If you would like to read more to extend Wingman further, follow this link: Further reading
Give it a try by asking a question in the prompt text area. Try "What causes a NullReferenceException in Unity".
Once you receive a response the WingmanResponses folder should contain this response.
Further Reading
How to supply a custom prompt
Coming soon.
How to use a system message
Coming soon.